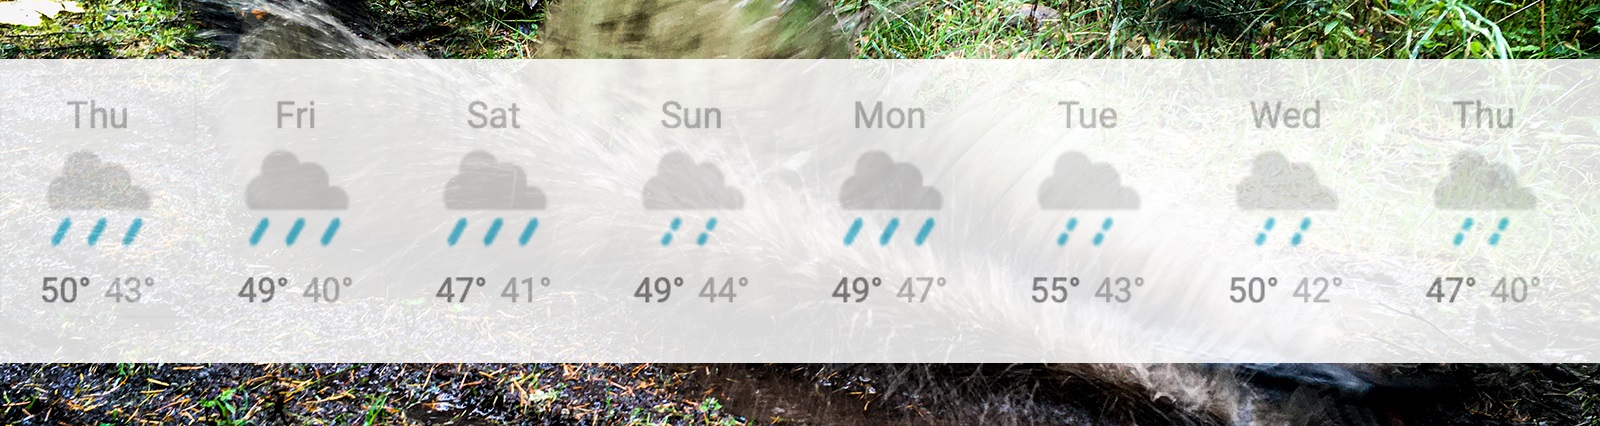
Your Guide To Riding In Wet Weather
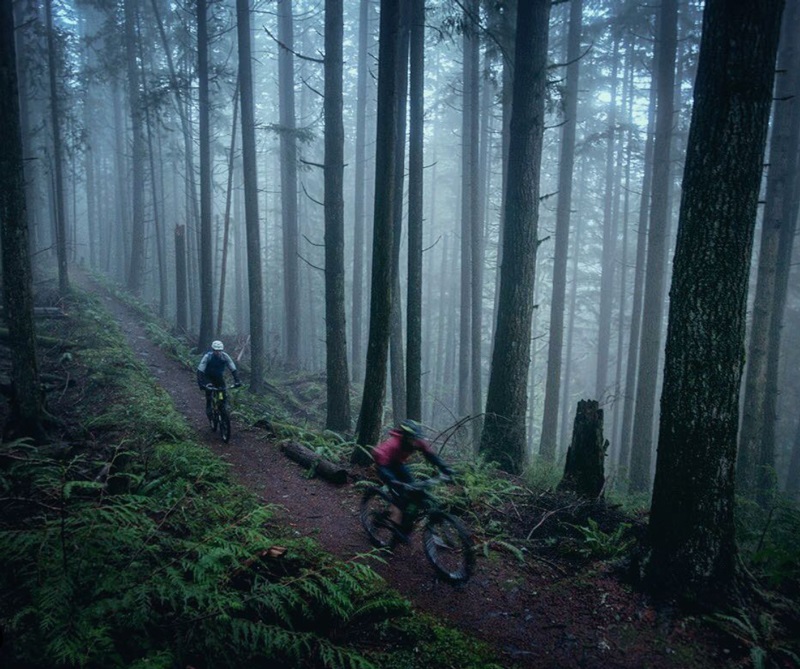
As clouds roll in and the skies open up, a hardy share of mountain bikers come alive.
Through winter, these riders embrace the dark, cold, and wet forests of Washington in search of a certain dreary day magic only found when quiet trails, clean air, and trees draped in mist come together to offer a peaceful backdrop for navigating slick roots and mud on a bike.
Riding in the rain isn’t everyone’s cup of tea, but with so many of our usual indoor activities closed, and our trails open, some riders are likely looking out the window and thinking about how they can extend their trail time well into the darker months of the year.
Having fun “in the wet” takes a higher level of preparation than a typical warm summer cruise. But, with a little extra care, and the following tips (including a few from Evergreen’s pro trail crew), you too can find joy in getting outside when the weather gets soggy.
What To Wear
“Comfort while wet is more effective than trying to stay dry,” -Bryan Connolly, Evergreen Builder
Truer words for tips on mountain biking through a Northwest winter may never have been spoken and all other advice that follows here stems directly from this essential adage.
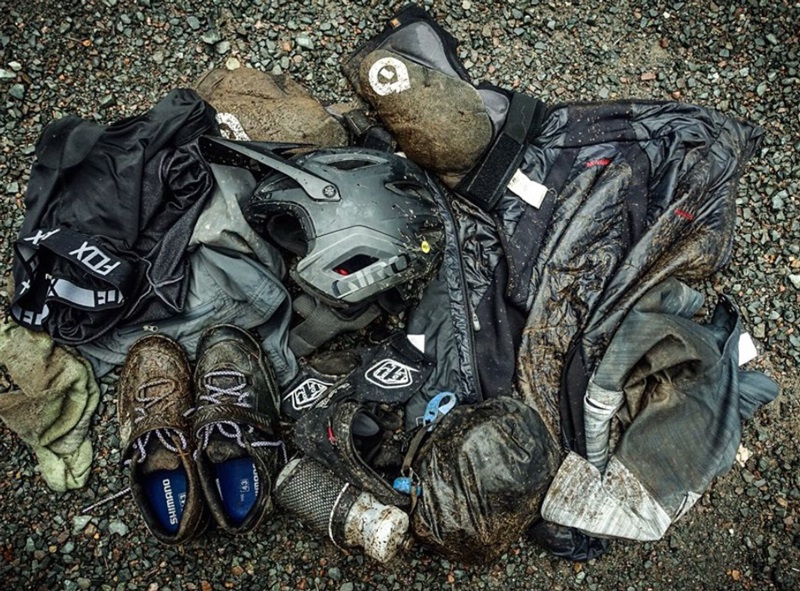
As you prepare for a wet ride, remember that staying dry is always a losing battle. No matter how hard you try, and regardless of what fancy “waterproof” gear you buy, water will always eventually seep its way in. The trick, instead, is to figure out how to remain comfortable and warm long after the initial shock of splashing through that first big puddle at the beginning of your ride.
To start, a proper base layer is key. Wool is a good material for base layers (your innermost layer of clothes) in wet weather because it retains heat even when wet. For mountain biking, avoid bulky wool (like your grandpa’s socks) and instead look for a wool blend that fits close to your skin, wicks moisture, and moves with you. The next layers you throw on top will depend on how cold it is. In the 60’s you may opt to wear just a thin jersey over your base layer while temperatures in the lower 40’s could call for a base layer, a mid layer, and an outer shell like a rain jacket. Whatever you decide on, beware of overdressing! It’s easy to get lured into too many layers when you’re shivering at the trailhead– donning your gear in the rain while you fumble with your car keys. Remember though, in a few moments you’ll be speeding along the trail, heart pumping, and it won’t feel nearly as cold as when you were standing around.
Keeping your hands and feet comfortable is the next step to dressing properly. For really cold weather, winter specific cycling gloves are usually enough, but we’ve also heard from some riders who swear by gloves made for ice climbing or nordic skiing. For your feet, try thin wool ski socks, or even waterproof socks– they’re not truly waterproof, but they do an admirable job of preventing that gross “waterlogged” feeling that comes when your feet and shoes are soaked.
What To Bring
“Bring three pairs of gloves. One for the uphill, one for the downhill, and one just in case.” - Nicholas Baker, Evergreen Builder
Bringing along a few simple items can greatly enhance your rainy experience out on the trail. We always recommend wearing eye protection while riding, but it’s especially important for wet weather riding because of all that mud and debris flying off your tires. Clear lenses, or lenses designed for very low light, are best.
If it’s really coming down, consider packing an extra pair of gloves (or even two!) in a ziploc bag so you can change into a dry pair when you feel your digits getting numb. Dropping into a big descent with dry gloves and warm(er) hands is always a morale booster. Another simple item to bring along for days when the mercury really drops is a set of hand warmers. Activate a pair of warmers just as you start your ride and keep one in each jacket pocket. Whenever you stop for a quick break, slip your hands inside your toasty warm pockets to help get blood circulating and flowing back into your fingertips.
If you drove to the trailhead, a few essential things can make the clean up and changing process a lot easier on you, your car, and its upholstery. Towels. Lots. Of. Towels. If you want to get fancy, pick up a surf hoodie towel for full changing coverage. It can also be helpful to stow all your mountain bike gear in a bin within your car to prevent dirt from flying all over the place and smearing across your interior. Keeping a few Hefty bags stowed away is another way to contain your especially muddy clothes– just don’t forget about it and leave it in the backseat for too long...
It’s also worth mentioning the “alternative” approach to handling your wheels: Embrace the dirt and throw a couple quarters in the vacuum at the car wash every so often!
How To Ride
“My favorite wet weather riding trick is to find an excuse not to,” -Brian Tustison, Evergreen Builder
Wet weather riding isn’t for everyone. And even though Brian spends more time riding, maintaining, and building trails in Washington than most, he does bring up a good point. It’s ok to kick the feet up and take a pass. In fact, on some days, especially when the freeze thaw cycle rears its ugly head, you absolutely should stay off the trails to prevent damage. If you typically ride trails in a more arid climate, like Central or Eastern Washington, then take extra precaution as these soil types are more easily harmed by riding in wet weather than trails on the west side of the Cascades. As a general rule of thumb, if you’re east of the Cascades, ride only if the streets are mostly dry. If you’re west of the Cascades, ride in anything but an outright downpour. Check out our "Riding In The Rain: Yay or Nay?" piece for a more detailed run-through on how moisture affects different soil types.
Ok, enough about not riding. How do you ride wet trails gracefully, skillfully, and with confidence? Well, for starters, you’re not going to learn on the internet. The more wet roots and muddy corners you face, the more adept you’ll become at handling them. The absolute best way to quickly improve your skills is to take a class with a professional instructor. A good instructor will be able to analyze your riding on the fly and help you with proper weight distribution, body position, and other techniques– all vital for quickly and efficiently navigating slick sections of trail. If you make a concerted effort to apply just one adjustment to your style on your next ride, make it this: Stay loose, and stay relaxed. Staying relaxed is a key part of mountain biking regardless of the trail conditions, but it’s especially important when the surface gets slippery. Not only will your bike’s tires naturally gain traction, but you’ll be better suited to handle unexpected slips and movements underneath you.
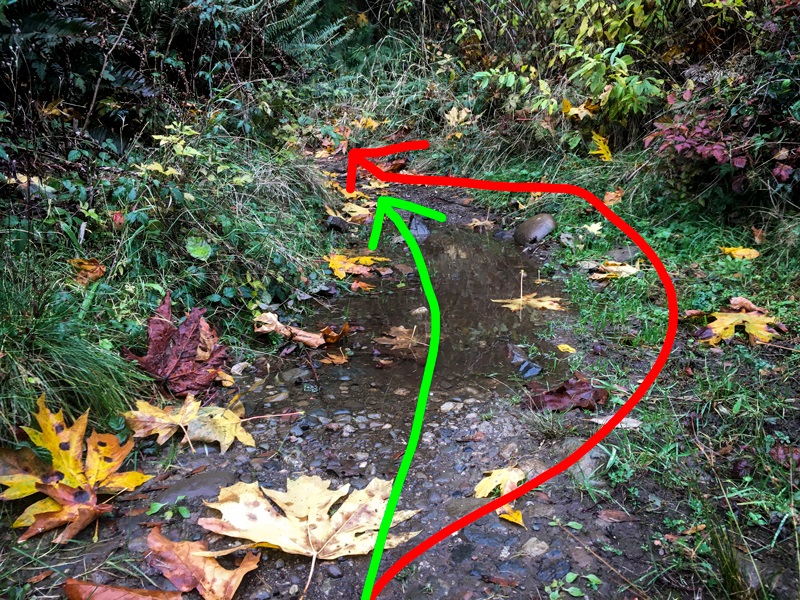
Sometimes staying loose and staying relaxed just isn’t enough though. Whether you’re a pro level mountain biker or just getting started in the sport, you’ll eventually come across a piece of trail that you’re just not feeling up for riding. There’s no shame in walking a tough section though– as long as you do it right! It sounds counterintuitive, but please stay on the trail if you need to walk your bike and do not tromp through plants off to the side. This causes erosion and widens the trail corridor.
The same concept applies to puddles on the trail. Ride through puddles and not around them! If you’re worried about getting your toes wet, harness the inner kid in you and throw your feet up on the handlebars as you sail through. Or– my personal favorite– pull up and bunny hop as far, and as high, as you possibly can. You’ll either clear the puddle completely and stay dry, or you’ll come up short and splash your ride buddy behind you. A win-win scenario.
Other Tricks and Tidbits
Collectively, the Evergreen staff has spent a whole bunch of time soaking wet in the woods. Here are a few other tips we’ve learned along the way:
- “My favorite "gear" is a boot/glove dryer! Makes it much easier to motivate myself for the next ride when everything is dry and ready to go :),” -Kristen McCune, Evergreen Education Program Manager
- “Pack a change of clothes that's easy to slide into, skinny jeans are hard to get into when you are sticky wet– leave them at home!” -Tara Moser, Evergreen Sr. Operations Manager
- “Invest in a bucket with a lid and a hole for a plunger to get most of the mud and dirt out of your gear before throwing it in the washer. It will greatly increase the life of the washer and happiness of your significant other.” -Cody Olsen, Evergreen Trail Maintenance & Volunteer Manager
- “Leave a hot drink in the car so it's there when you get back.” -Bobby Stewart, Evergreen Operations and Volunteer Coordinator
- “Okay, here’s your tip for the day. Dogs. Dogs in coats. They love having your hands under there and it’s really warm! They don’t have to be yours. Any good dog will do.” -Bryan Connolly, Evergreen Builder